Building From Source
Compiling Release Branch (production)
Release source build
TOKEN=YOURSIGNALWIRETOKEN

apt-get update && apt-get install -yq gnupg2 wget lsb-release

wget --http-user=signalwire --http-password=$TOKEN -O /usr/share/keyrings/signalwire-freeswitch-repo.gpg https://freeswitch.signalwire.com/repo/deb/debian-release/signalwire-freeswitch-repo.gpg

echo "machine freeswitch.signalwire.com login signalwire password $TOKEN" > /etc/apt/auth.conf

chmod 600 /etc/apt/auth.conf

echo "deb [signed-by=/usr/share/keyrings/signalwire-freeswitch-repo.gpg] https://freeswitch.signalwire.com/repo/deb/debian-release/ `lsb_release -sc` main" > /etc/apt/sources.list.d/freeswitch.list

echo "deb-src [signed-by=/usr/share/keyrings/signalwire-freeswitch-repo.gpg] https://freeswitch.signalwire.com/repo/deb/debian-release/ `lsb_release -sc` main" >> /etc/apt/sources.list.d/freeswitch.list

apt-get update

# Install dependencies required for the build

apt-get build-dep freeswitch

# then let's get the source. Use the -b flag to get a specific branch

cd /usr/src/

git clone https://github.com/signalwire/freeswitch.git -bv1.10 freeswitch

cd freeswitch

# Because we're in a branch that will go through many rebases, it's
# better to set this one, or you'll get CONFLICTS when pulling (update).

git config pull.rebase true

# ... and do the build

./bootstrap.sh -j

./configure

make

make install
Starting FreeSWITCH
Set Owner and Permissions
# create user 'freeswitch'
# add it to group 'freeswitch'
# change owner and group of the freeswitch installation

cd /usr/local
groupadd freeswitch

adduser --quiet --system --home /usr/local/freeswitch --gecos "FreeSWITCH open source softswitch" --ingroup freeswitch freeswitch --disabled-password

chown -R freeswitch:freeswitch /usr/local/freeswitch/

chmod -R ug=rwX,o= /usr/local/freeswitch/

chmod -R u=rwx,g=rx /usr/local/freeswitch/bin/*
Start Freeswitch after installation
- Navigate to the directory where FreeSWITCH is installed. The default installation directory is usually
/usr/local/freeswitchon Linux systems. - Navigate to the bin folder and run the following command to start freeswitch
./freeswitch - Note: If you want to run FreeSWITCH in the background as a daemon, you can use the -nc flag with the startup command: .
/freeswitch -nc. This will prevent FreeSWITCH from attaching to the terminal and allow it to run in the background. - To access the FreeSWITCH CLI, navigate to the bin folder in the FreeSWITCH installation directory. Then run the following command: ./fs_cli
(Optional) Create systemd freeswith service to auto start freeswitch
https://github.com/traviscross/freeswitch/blob/master/debian/freeswitch-systemd.freeswitch.service
Refrences
- https://github.com/Omid-Mohajerani/freeswitch/wiki/FreeSWITCH-1.10-installation-guide-from-source-on-debian-11
- https://developer.signalwire.com/freeswitch/FreeSWITCH-Explained/Installation/Linux/Deprecated-Installation-Instructions/Debian-Post-Install-Tasks_13172868#about
- https://developer.signalwire.com/freeswitch/FreeSWITCH-Explained/Installation/Linux/Debian_67240088
Start Doing local extension Calls
Freeswitch by default will create some users with pass (1234) for you starting from 1000 to 1019, u can check the Configs for these users in the following directory :-
/usr/local/freeswitch/conf/directory/default Using a sip phone of choice u can start making calls and registering extensions , however there will be 10 second delay after dialing because the default password for extensions has not been changes , u can change this in the vars.xml file :-
nano /usr/local/freeswitch/conf/vars.xml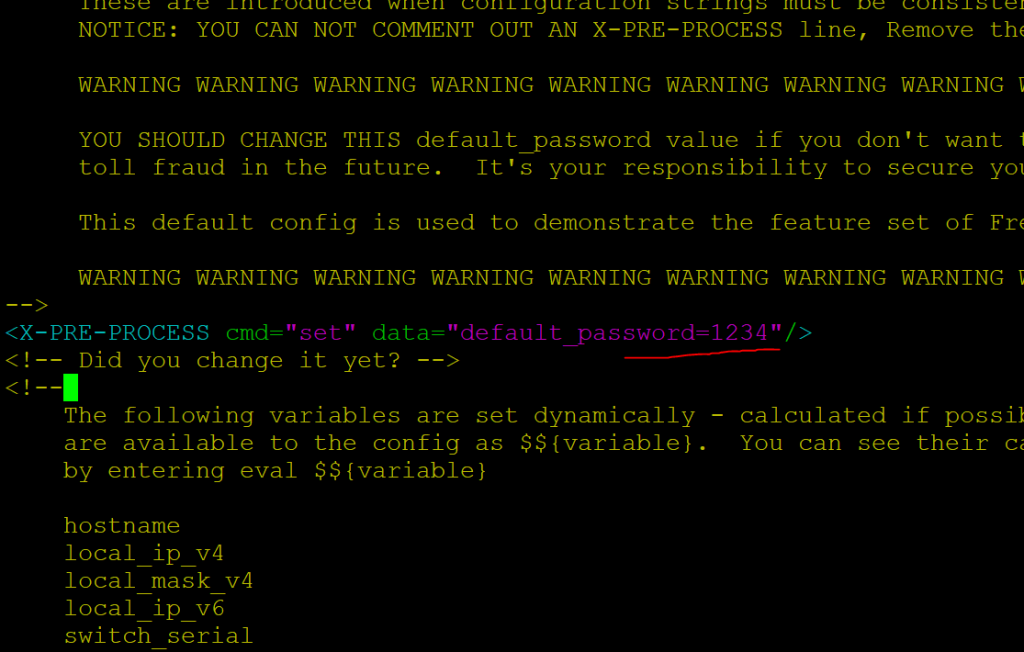
After changing default password , run the following to reload the config form fs_cli :-
reloadxml